How to Schedule Instagram Reels for Maximum Reach
Scheduling Instagram Reels is the key to growing your account and maximizing your reach. Here's why and how you should do it:
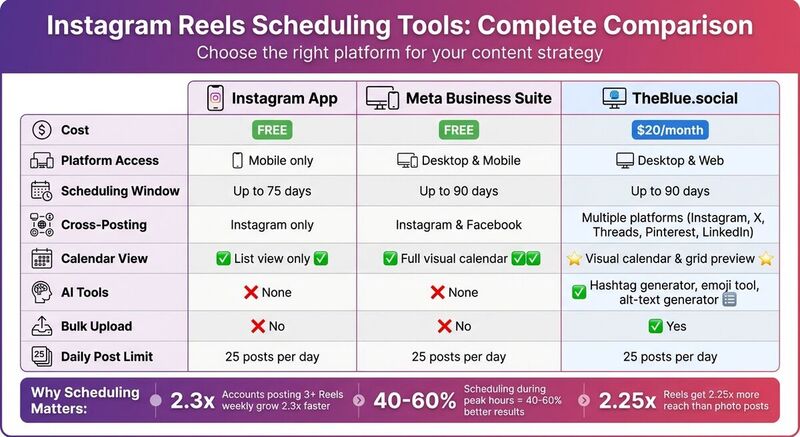
- Why it matters: Accounts posting 3+ Reels weekly grow 2.3x faster and see 2.25x more reach. Scheduling ensures consistency, saves time, and helps you post during peak engagement hours for 40%-60% better results.
- Tools to use: Platforms like TheBlue.social let you schedule Reels, manage multiple platforms, and optimize posts with AI tools like hashtag generators and alt-text creators.
- Setup tips: Use a Professional Instagram account (Business or Creator), link it to a Facebook Page, and follow Instagram's guidelines for video format, size, and duration.
- Best times to post: Use Instagram Insights to find when your audience is active. Generally, mornings (7-9 AM), lunch breaks (11 AM-1 PM), and evenings (7-9 PM) work best.
Quick Comparison of Scheduling Tools
| Feature | Instagram App | Meta Business Suite | TheBlue.social |
|---|---|---|---|
| Cost | Free | Free | $20/month |
| Scheduling Window | 75 days | 90 days | Up to 90 days |
| Cross-Posting | No | Instagram & Facebook | Multiple platforms |
| AI Tools | None | None | Hashtag generator, alt-text, etc. |
Scheduling your Reels with the right tools and timing can help you grow faster while saving time. Focus on creating engaging, high-quality content, and let scheduling tools handle the rest.
How to Actually Schedule Instagram Reels So You Can Post Reels Consistently
What You Need Before Scheduling Instagram Reels
Before diving into scheduling Instagram Reels with TheBlue.social, you’ll need to ensure your account is set up correctly. The process is straightforward, but there are a few key steps you can’t skip.
Instagram Account Setup
To use third-party scheduling tools like TheBlue.social, your account must be a Business or Creator account. Personal profiles don’t support API-based scheduling, so if you’re still using a personal account, you’ll need to switch.
Here’s how to make the switch: Open the Instagram app, go to Settings → Account Type and Tools → Switch to Professional Account, and select either Business or Creator. Both options enable scheduling features, so choose the one that best suits your content strategy.
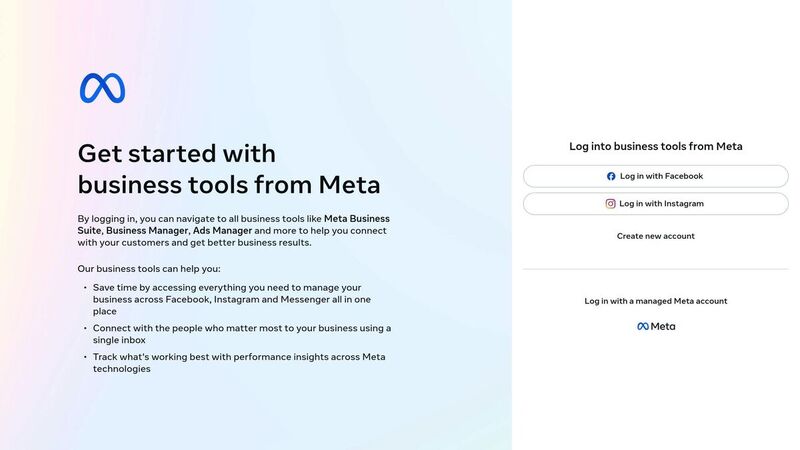
Additionally, if you’re using a Business account, you’ll need to link it to a Facebook Page. This connection is essential for enabling auto-publishing. You can confirm the link through Meta Business Suite on your desktop to ensure everything is properly set up before connecting to TheBlue.social.
Once your account is ready, it’s time to handle the technical setup.
Technical Setup for Scheduling
After your account is configured, the next step is authorizing TheBlue.social through Instagram’s official API. This step gives the platform the permissions it needs to post Reels and manage your media library. During the authorization process, a pop-up will appear asking for various permissions - make sure to enable all the requested options to unlock full functionality.
When uploading Reels, follow these technical requirements to avoid errors:
- File format: MP4 or MOV
- Aspect ratio: 9:16 (1,080 x 1,920 pixels)
- Duration: 5–90 seconds
- File size: Under 1 GB (preferably below 250 MB for faster processing)
TheBlue.social allows you to schedule Reels up to 75–90 days in advance, with a limit of 25 posts per day. With these settings in place, you’re ready to start streamlining your content calendar.
How to Schedule Instagram Reels Using TheBlue.social
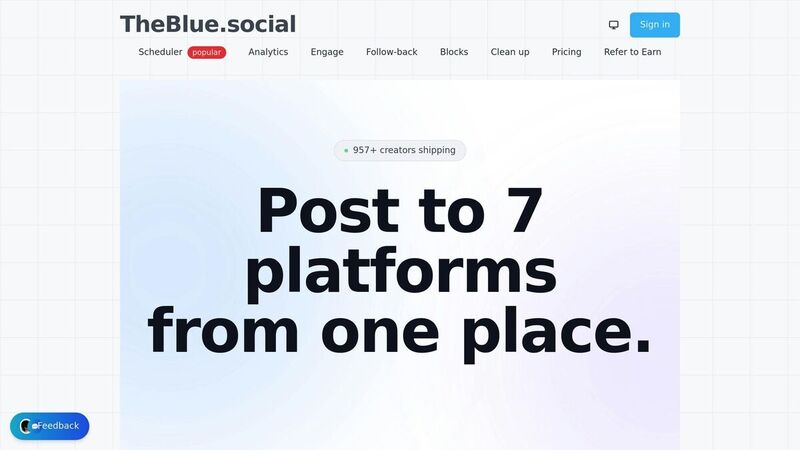
Once your account is set up, you're ready to start scheduling Instagram Reels through TheBlue.social. The platform is designed to make the process simple, offering tools to fine-tune your content before it goes live.
Setting Up Your TheBlue.social Account
Head over to TheBlue.social and sign up using your email. Once logged in, click "Connect a Profile", choose Instagram, and complete Meta's authorization process by granting all required permissions. Keep in mind, if permissions aren’t fully granted, auto-publishing won’t work - you’ll only get mobile reminders instead. After authorization, your Instagram account will appear in your TheBlue.social dashboard, ready for action.
With your account linked, you can now upload and schedule your Instagram Reels.
Uploading and Scheduling Reels
In your dashboard, click "Create Post" and select Instagram as your platform. Upload your Reel file, ensuring it meets the technical specifications outlined earlier. Add your caption, choose a cover frame, and include hashtags.
To save time, use the free hashtag generator to find hashtags that can improve your Reel's visibility. After setting up your post, pick the date, time, and U.S. time zone (EST, CST, MST, or PST) for publishing. This ensures your Reel goes live when your audience is most active. You can schedule posts up to 75–90 days in advance.
Free Tools to Improve Your Reels
Before finalizing your scheduled Reel, take advantage of TheBlue.social's free optimization tools to give your content an extra edge.
- Use the alt-text generator to create descriptive text for your Reels. This not only improves accessibility for users relying on screen readers but also helps Instagram categorize your content for better search visibility.
- If your Reel includes on-screen text or graphics, the text extraction tool can pull that text into your caption or notes, making it easier to repurpose.
- Add a touch of personality to your captions with the emoji tool, which helps you quickly find and insert relevant emojis.
These small tweaks can make a big difference in how your Reels perform once they’re live.
Scheduling Reels with Instagram and Meta Business Suite
Instagram and Meta offer free scheduling tools that make it easier for creators to plan their content within the platform's ecosystem. To use these tools, you'll need a Professional account. The table below highlights key differences between scheduling workflows.
Scheduling Reels in the Instagram App
The Instagram app allows you to schedule Reels up to 75 days in advance, with a daily limit of 25 posts [4]. Here’s how to do it:
- Open the Instagram app and tap + to create a new post.
- Select Reel, then record or upload your video.
- Tap Next, and on the share screen, go to Advanced Settings (or More Options).
- Toggle on Schedule this reel, set your desired date and time, and tap Done.
- Return to the main share screen and tap Schedule to finalize.
If you need to make changes or delete a scheduled Reel, head to your profile, tap the three-line menu in the top-right corner, and select Scheduled content. This method is ideal for creators who edit videos on their phones and want a simple, no-cost way to schedule content.
Using Meta Business Suite for Scheduling
For those who prefer a desktop-friendly option, Meta Business Suite offers a more comprehensive scheduling experience. You can plan posts up to 90 days in advance [4], but your Instagram account must be linked to a Facebook Page to use this tool. Here’s how it works:
- Log into Meta Business Suite and navigate to the Planner or Content tab.
- Click Create Reel, upload your video (ensure it’s 1080 x 1920 pixels in MP4 format and between 5–90 seconds long), and add your caption, thumbnail, and location.
- Select Schedule, choose your preferred date and time, and confirm.
Meta Business Suite’s calendar view gives you a visual overview of your schedule across Instagram and Facebook, making it easier to manage content. The desktop interface is particularly helpful for editing longer captions and ensuring your scheduled posts align with your target U.S. time zone. This tool is a great fit for creators who want a more structured approach to content planning.
Comparing Your Scheduling Options
Here’s a quick breakdown of how Instagram’s native tools compare to TheBlue.social, a paid scheduling platform, so you can decide what works best for your needs:
| Feature | Instagram App | Meta Business Suite | TheBlue.social |
|---|---|---|---|
| Cost | Free | Free | Paid ($20/month) |
| Platform | Mobile only | Desktop & Mobile | Desktop & Web |
| Scheduling Window | Up to 75 days | Up to 90 days | Flexible |
| Cross-Posting | Instagram only | Instagram & Facebook | Instagram, X, Threads, Pinterest, LinkedIn |
| Calendar View | List view only | Full visual calendar | Visual calendar & grid preview |
| AI Tools | None | None | Hashtag generator, emoji tool, alt-text generator |
| Bulk Upload | No | No | Yes |
While Instagram’s built-in tools are perfect for quick, mobile-first scheduling, TheBlue.social shines when managing multiple platforms or automating content creation. Many creators find that combining both - a quick, native tool for mobile posts and a paid platform for strategic, multi-platform campaigns - offers the best balance for their workflow.
Finding the Best Times to Post Your Reels
Timing is everything when it comes to posting Reels on Instagram. Within the first 1–2 hours of posting, Instagram tests your Reel with a small group of users to gauge its performance[4]. If it generates strong engagement during that period, the algorithm is more likely to promote it on the Explore page, giving it a much broader reach. To make the most of this, aim to post during the times your audience is most active. Here’s how you can identify those peak moments using Instagram’s tools and a bit of experimentation.
Using Instagram Analytics to Identify Peak Activity
If you’re using a Professional account - whether Business or Creator - Instagram offers a tool to help you track when your followers are online. To access this, open the app, head to your profile, tap the three-line menu, and select Insights. Scroll down to the Total Followers section, where you’ll find the Most Active Times chart. This handy heatmap displays your followers' activity by hour and day.
However, keep in mind that this data reflects when your audience is online, not necessarily when they’re engaging with your content. To refine your strategy, you’ll need to test different posting times to see what works best for your specific audience.
Experimenting with Posting Times
A four-week experiment can help you zero in on the most effective times to post. For the first two weeks, post Reels at different times each day (e.g., Monday at 9:00 AM, Tuesday at 12:00 PM, Wednesday at 7:00 PM). Afterward, review your Instagram Insights to calculate engagement rates. Add up Likes, Comments, Shares, and Saves, then divide that total by the Reach to determine your engagement rate.
In the third week, analyze your data to identify which time slots performed best. In the fourth week, dedicate 70% of your posts to those high-performing times while using the remaining 30% to test new slots[4]. This method allows you to base your posting schedule on actual audience behavior rather than guesswork.
Timing Strategies for U.S. Audiences
For U.S.-based audiences, there are three primary windows of activity: mornings during the commute (7:00 AM to 9:00 AM), lunch breaks (11:00 AM to 1:00 PM), and evenings when people are winding down (7:00 PM to 9:00 PM)[6][5]. Given the country’s multiple time zones, it’s crucial to plan accordingly. For instance, a post at 9:00 AM EST will reach both East Coast users starting their day and West Coast users just waking up.
If your audience skews younger, consider posting later in the evening. Gen Z users tend to be active between 7:00 PM and 10:00 PM, with another spike after 11:00 PM[3]. Additionally, niche audiences have their own patterns. Fitness enthusiasts often engage early in the morning (6:00 AM to 8:00 AM) and after work (5:00 PM to 7:00 PM), while parenting-focused accounts may see the most activity between 8:00 PM and 10:00 PM, after kids are in bed[4].
These insights, combined with your analytics and experiments, can help you fine-tune your posting schedule for maximum reach.
| Industry | Best Posting Windows (Local Time) | Why These Times Work |
|---|---|---|
| Business/Finance | Tue–Thu, 8:00 AM – 11:00 AM | Morning routines are prime for engagement[4]. |
| Food/Cooking | Mon–Fri, 11:00 AM – 1:00 PM | Users search for meal ideas during lunch[4]. |
| Entertainment | Wed–Sun, 6:00 PM – 11:00 PM | Leisure time means more scrolling[4]. |
| Travel | Wed–Fri, 12:00 PM – 2:00 PM | Mid-week work breaks inspire daydreaming[4]. |
For best results, schedule your Reels about 30 minutes before your audience’s peak activity. This gives Instagram enough time to index your video so it’s ready to appear in feeds when users log on[7]. Also, avoid posting at the exact same time every day - try something like 10:07 AM instead of 10:00 AM. This small tweak helps you reach different segments of your audience and makes your posting schedule appear more natural[4].
Making Your Scheduled Reels More Engaging
Once you've nailed the timing for your Instagram Reels, the next step is creating content that grabs attention and keeps your audience engaged. Reels have the potential to reach 2.25 times more users than photo posts and generate 22% more engagement than standard videos[2]. To make the most of this opportunity, focus on three critical elements: crafting content that hooks viewers instantly, writing captions and hashtags that encourage interaction, and incorporating accessibility features that ensure your Reels are inclusive and aligned with your brand.
Creating Better Reel Content
The first three seconds are everything. If viewers scroll past too quickly, your reach takes a hit[9][10]. To stop them in their tracks, start with a bold visual hook - this could be an eye-catching text overlay, a surprising opening shot, or a quick cut that demands attention. For example, instead of easing into your story, jump right into the most captivating part or tease an exciting moment to come.
Keep your Reels short and snappy. Videos between 7 and 15 seconds generally perform the best, with higher completion rates signaling value to Instagram[8][11]. If your story requires more time, make every second count - trim unnecessary pauses, tighten edits, and maintain a fast pace. Also, ensure your video is vertical (1080 x 1920) for optimal viewing.
Using trending audio is another smart move, but there's a catch. Most scheduling tools can’t directly access Instagram’s trending sounds due to API restrictions. Instead, use an external editor like CapCut to embed the trending audio into your video file before uploading it to your scheduler[2]. This way, you can still leverage popular sounds while scheduling your posts efficiently.
Writing Captions and Choosing Hashtags
Captions are your chance to spark conversations. Start strong - those first 125 characters are crucial since they appear before the "...more" button[4]. Pose a direct question, share a surprising fact, or offer a fresh perspective to draw readers in.
"The quality of your hashtags matters much more than the quantity." - Carly Lynn, Instagram[1]
When it comes to hashtags, aim for 5 to 8 carefully chosen tags that include a mix of broad, niche, and branded terms. Avoid overly saturated tags like #Reels or #InstaGood - they won’t help you stand out. Instead, use tools like TheBlue.social's hashtag generator to find tags tailored to your content and audience. For a cleaner look, try the "first comment" strategy: post your caption without hashtags and then add them as a comment immediately after[2][12].
"Adding a first comment... helps improve the look and feel of my post and drives reach at the same time." - Chloe Pedersen, Art Director, Ranch & Coast Magazine[12]
Adding Accessibility Features and Branding
Accessibility is a must, not an afterthought. Adding alt text to your Reels ensures screen readers can describe your content to visually impaired users. Both TheBlue.social and Instagram’s native scheduler allow you to enable this feature under "Advanced Settings"[2][1]. If you’re unsure how to write alt text, TheBlue.social's alt text generator can help.
Make your on-screen text bold and high-contrast so it’s easy to understand even without sound[1]. Keep it concise - one or two sentences per frame work best.
Finally, ensure your Reels align with your brand visually. Instead of relying on random video frames as covers, create custom thumbnails that reflect your brand’s aesthetic. Use consistent fonts, complementary colors, and branded illustrations to maintain a cohesive look. Tools like TheBlue.social's profile picture editor can help refine your branding elements. A polished, professional grid not only enhances your profile’s appearance but also communicates your brand’s identity clearly to visitors.
| Feature | Optimization Strategy |
|---|---|
| Captions | Start with a strong hook; include a clear call-to-action; make the first 125 characters count. |
| Hashtags | Use 5-8 specific tags; place them in the first comment; avoid overly generic tags. |
| Audio | Embed trending sounds into your video file using tools like CapCut before scheduling. |
| Visuals | Stick to a 9:16 aspect ratio; design custom covers with Canva; use bold text hooks. |
Conclusion
Scheduling Instagram Reels isn't just about saving time - it's about maximizing your content's potential. By batching your content, posting during peak engagement times, and using data-driven insights, you can significantly boost your growth. Scheduled posts ensure your Reels gain traction at the right moments, even when you're not actively online.
Platforms like TheBlue.social make this process effortless. With direct scheduling, AI-powered tools for crafting captions and generating hashtags, and cross-posting features, you can extend your reach beyond Instagram. Tools like their hashtag generator and alt text tool help optimize your Reels for better discoverability and accessibility without adding extra steps to your workflow. These features turn scheduling into a seamless, results-driven process.
Keep in mind, Instagram Reels generate 2.25 times more reach than photo posts and see 22% more engagement compared to standard videos[2]. By pairing a strategic schedule with compelling hooks, well-researched hashtags, and accessible content, you position yourself for steady growth. Test different posting times over a month, analyze the results, and fine-tune your approach.
Consistency is the real game-changer here, and scheduling helps make it manageable. Whether you're an individual creator or juggling multiple accounts, using the right tools can transform content planning from a daily challenge into a smooth, efficient process. Focus on producing quality Reels, and let scheduling take care of the rest as your audience grows.
FAQs
What are the advantages of scheduling Instagram Reels?
Scheduling Instagram Reels is a smart way to stay consistent and organized while managing your content. By planning ahead, you can create and schedule posts during optimal times for your audience, eliminating the stress of last-minute uploads and helping you maintain a steady flow of content without feeling overwhelmed.
It’s also a great way to boost your content’s visibility and engagement. Posting during peak activity times increases the likelihood that your Reels will be seen and shared, as Instagram’s algorithm tends to favor consistent and timely posts. Plus, scheduling makes it easier to align your Reels with key events, campaigns, or product launches, ensuring your content remains timely and relevant.
Another advantage? You can track the performance of your scheduled Reels and use the insights to fine-tune your strategy. This way, every post becomes a stepping stone for growing your audience and making your content work harder for you.
What’s the best way to schedule Instagram Reels for maximum engagement?
To get the most engagement when scheduling Instagram Reels, start by checking out your audience's activity patterns. Dive into Instagram Insights to figure out when your followers are most active and take note of the times your previous Reels got the best response. While peak engagement often happens on weekdays between 11:00 AM–2:00 PM or 7:00 PM–9:00 PM, your audience might have its own unique rhythm.
After pinpointing your ideal posting times, try using TheBlue.social to schedule your Reels ahead of time. This tool not only helps you post at the right moment but also lets you monitor how your content performs, making it easier to fine-tune your approach. Keep an eye on your analytics regularly and tweak your schedule as needed to align with your audience's habits.
How can TheBlue.social help me schedule and optimize Instagram Reels?
TheBlue.social offers a cross-platform post scheduler that simplifies planning and posting Instagram Reels. You can seamlessly schedule Reels alongside content for platforms like X, Threads, Pinterest, Bluesky, and Mastodon, ensuring your posts go live at the perfect time to maximize engagement.
To make your Reels even better, TheBlue.social includes free tools designed to save time and boost impact. These tools feature a hashtag generator to improve discoverability, an alt-text generator for crafting accessible thumbnail descriptions, and an emoji tool to add personality to your captions. With these features, creating standout Reels becomes a smoother and more efficient process.
Last updated: January 10, 2026